An internet connection is required for sound generation, but not to use the saved sounds and kits. This allows to make this technology available to you without the need to buy or rent expensive GPU time.
“Emergent Drums” does not create sounds with oscillators, filters or envelopes. It does not mix samples together or use FM. It is something completely different.
This is a A.I. “G.A.N” audio synthesis (generative adversarial network). A new audio file is created directly with elements “learned” by the software over time. The results can be classic but often unexpected and not similar to classical drum synthesis. This is one of the most interesting part.
Emergent Drum makes it easy to get complex and different sounds, in an interface suitable for sound and music creation, i.e. as a VST3/VST2/AU plugin available directly in your DAW.
Des synthés et voix et reverb/delay sont ajoutés à certains moments, pour montrer comment Emergent Drums peut sonner dans une composition.
These 3 MP3s were made with the same midi sequence. No FX /Eqs…
Alien Forest 01
Alien Forest 02
Alien Forest 03
These 3 MP3s were made with the same midi sequence. No FX /Eqs …
Rock & Groove 01
Rock & Groove 02
Rock & Groove 03
1. Creating sounds
Click on the “Generate” icon at the top of the panel to change the sound of all cells, or on each individual cell to change only that particular cell.
To hear the sound, click on the waveform display or on the “listen” icon (see (8) in the next section), or play the notes with midi keyboard/pads.
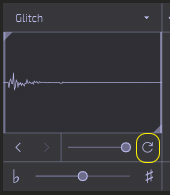
You can change the type of sound by changing the category, above the display (e.g. kick, snare, hats, glitch, percussion, noise…)
Re-Generate all Cells
See (2) on the figure below
Re-Generate single cell Large View
Re-Generate single cell Compact View
See (11) on the figure below
2. Most used controls
1 – Open Main Menu with preferences and « all sample export »
7 – Mute this cell
2 – Regenerates all cell. All sounds will be changed
8 – Play this sound. This can also be done by clicking on the waveform display.
3 – Display of the category name. This category name will also be part of the sample name once exported to disk or DAW.
9 – Drag this cell to another location. This is done by clicking the icon on dragging onto another cell. The two cells will exchange position (no deletion).
4 – Menu to change the category of sound. Changing the category will immediate regenerate the cell with a new sound.
10 – Previous/next sounds. Allows browsing the history of generated sounds for this particular cell. It allows getting back to a sound you really liked. It is not an « undo », but a simple browser in the history of generated sounds.
5 – Click the preset name to open preset menu with save/import and recent presets.
11 – Regenerate this particular cell.
6 – Drag this particular sound to an audio track of your DAW (click and drag the icon to an audio track).
12 – Pitch the sound up/down. I actually don’t use it much 🙂
.
3. Export All Samples to disk
At the top-left of the plugin, click on the arrow to open the drop-down menu.
In addition to various information, you will find these 3 “most used” functions:
– View mode: switch between Compact and Large Mode
– Window Size: ro resize the panel size
– Export All Samples: exports all samples in a folder of your hard drive.
Exported samples are pre-edited in order to avoid clicks. There is a quick fade-in and fade-out that avoids clicks.
4. Save / Load Kit Presets
At the top-right of the plugin, click on the “Current Kit ” preset name.
This will open a list of your recent saved kits/presets, as well as the Save / Load Kit menus at the bottom of the list.
5. Workflows
You can work with Emergent Drums in different ways. There is no best method, because it depends on how you want to do it today. Tomorrow may be different.
Since version 1.4.0, there is also the pôssibility to use discrete output for each drum sounds (see chapter “6” below).
1/ Create Kits without midi.
You can simply load the plugin and begin generating sounds on each cell, one by one, by clicking on the cell to hear the sounds. Once you have a sound that you like, go to the next cell and repeat the process for all 16 cells (or the number you want). Then, export all the sounds to disk so they can be re-imported later into your favorite groovebox or sample player.
2/ Create with a midi pattern
Just create a midi drum pattern, and let it run while you edit the sounds of Emergent Drums.
This is a cool method for creating dozens of presets and sample kits in a few minutes: you just regenerate all cell or some of them and see which are cool in this drum pattern. Creating a midi pattern allows to use Velocity and the Release parameters.
Multiple Outputs
(since version 1.4.1)
Activate the Multiple Outputs to send each individual sounds to a track of your DAW.
It allows to create kits while using your favorite Eqs, Compressors, Aux effects and bus/groups.
Click on the main menu and choose “multi” in the “Output Routing” menu.
Now, activate multiple outputs for Emergent Drums in your DAW.
The exact process depends on each DAW.
In Studio one, click on the instrument in the instrument list and choose “expand” or “deploy”. Then check each individual output to activate them.
Instrument list in Studio One
6. Additional Parameters
These parameters are not part of the generated sound and are added after. They are “post-generation” parameters to bring more confort and flexibility at the creation stage.
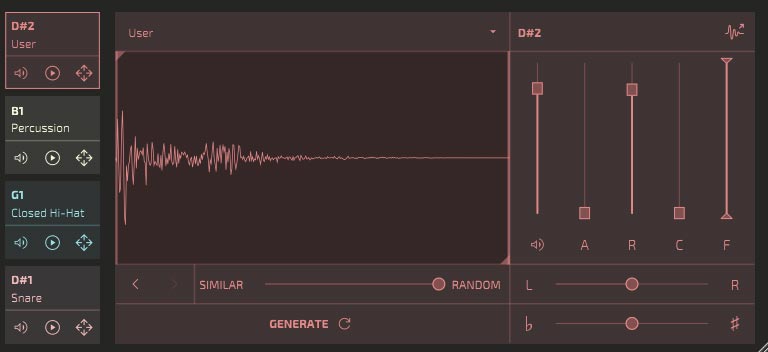
Compact view of the “Post-Generation” parameters
You can click on the waveform to hear the sound.
On the display, two horizontal sliders allow you to set the start and end of each sample.
The Similar/Random fader lets you generate sounds similar to or different from the current sound, with minimal or drastic variations.
The first vertical fader is a Gain of -inf to +12 dB. Default: -3dB. The icon below this fader is a mute on/off button. Above the gain fader, you will find the midi note to which this sound is assigned: click on it to change it.
A: Attack time. Default value: minimum (0)
R: Release. Decay time of the sound after the release of the note. this allows programming long and short notes which will have a different effect and create subtleties. Requires sounds long enough for a Release to be heard.
C: Clipping, for more or less clean or saturated sounds.
F: Filter. allows you to adjust the minimum and maximum frequency with the two ends of the fader (high pass and low pass filters), and to create a “band pass” filter. This filter is not adjustable and should be seen more as a quick little equalizer.
b / #: the note pitch (pitch) to transpose the current sound.
L/R: sound placement in the left/right stereo pan
7. Loading your own samples
(since version 1.4.2)
You can drag and drop any .wav sample, from your file explorer or DAW file explorer, on any cell of Emergent Drums.
The cell will turn red, and the sample will get categorized as “Imported”.
The “Generate” button will not generate a new sample for cells with a user sample.This is intended, and means you can build a kit around one or a few sample that you already have generated (or from any other source), directly inside Emergent Drums, without the need to launch another sample player, and without the risk of loosing those samples when you “generate” new sounds.